
NCASS Digital Safety Management System
Save time, reduce hassle and keep your business inspection-ready.
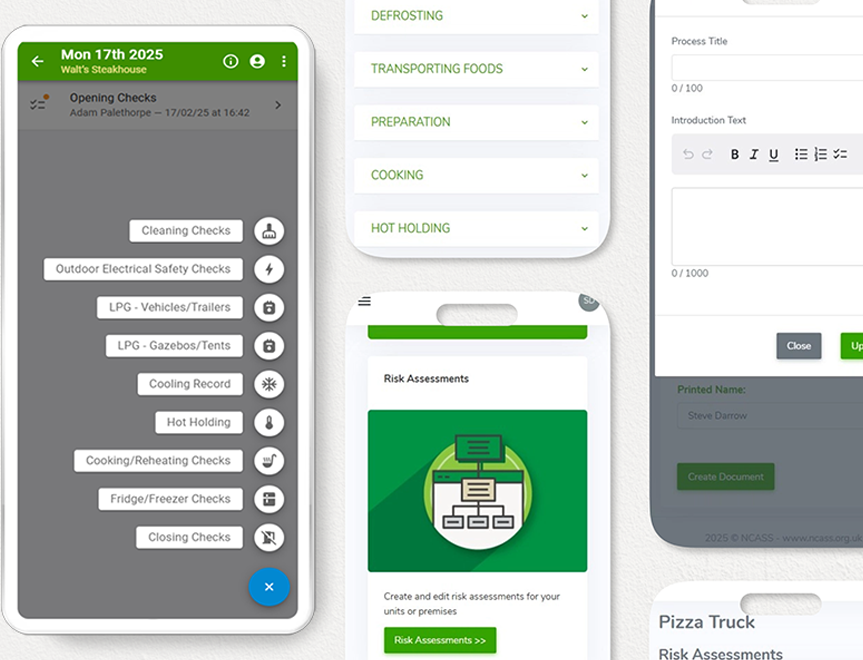
The Digital Safety Management System (DSMS) has been designed with caterers in mind, therefore we’ve made the operation and use of the DSMS as intuitive as possible.
If you take the time to set everything up properly, the DSMS should help to make the compliance process of your business smoother and more straightforward.
There are instructions built into the system. You can click the Information button at the top of each screen for instructions.
01: Visit dsms.ncass.org.uk or use the button below
02: Enter your NCASS username and password.
You will only be able to log in here if you have been given access to the new system. We are currently onboarding members and we will have been in touch to let you know if you have access.
DSMS Log in
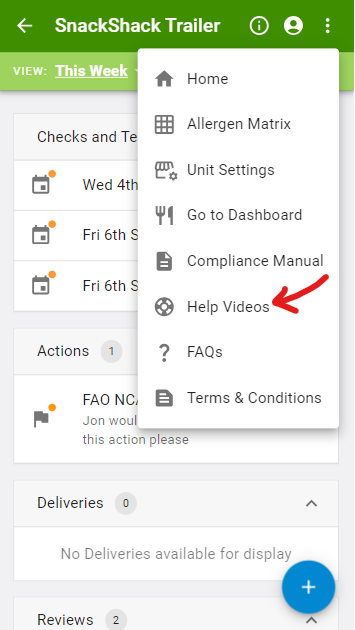
There are instructional videos for each area of functionality within the DSMS.
To access these help videos, simply click the ellipsis menu in the top right corner of the app and click Help Videos.
Alternatively, you can click the button below to open the videos in a new tab.
Help Videos
The DSMS synchronises information with your Member Dashboard. For you to use the Digital Safety Management System, you need to have:
You cannot create units or Risk Assessments in the DSMS, however once that information and documentation is completed in your Member Dashboard, it will be automatically synced through to the DSMS.
Once these actions are complete, you will be able to view your units on the DSMS homepage, as well as access completed Risk Assessments, and any other documents uploaded to the Member Dashboard.

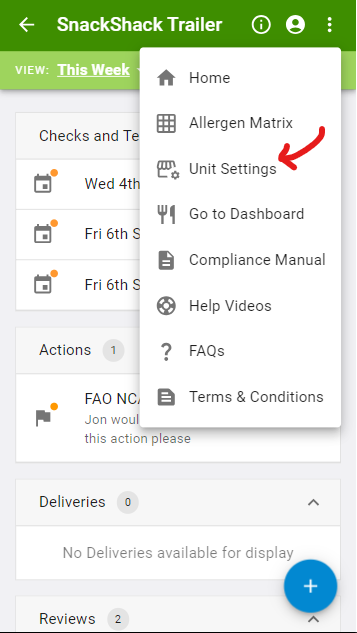
Now you have logged in and can see the information there, you should set up your unit(s)/premises within the DSMS.
Press the ellipsis at the top right of the screen, then select ‘Unit Settings’.
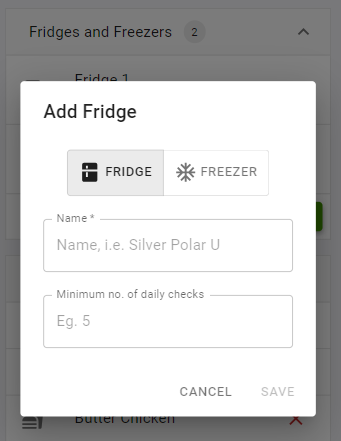
Add in the fridge and freezer appliances you use and enter the minimum number of times they need to be temperature checked each day. (Note: setting the minimum no. of checks is optional)
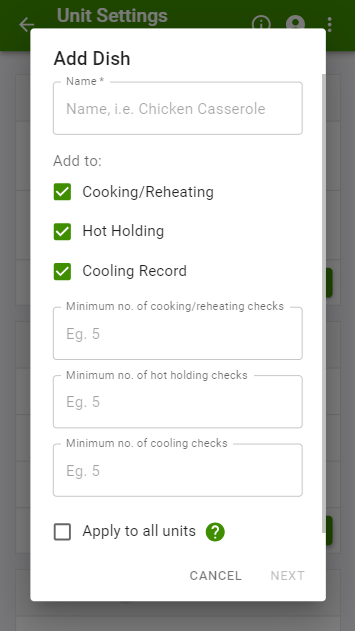
Add your dishes for the unit and specify which checks they apply to, such as cooking, reheating, hot holding, or cooling.
Dishes that are added into unit settings are automatically added to the allergen page. Dishes that are added using the blue plus button via a trading day are now also added into the list of dishes in the unit settings.
Add in your supplier details to support with your delivery checks. This way each time you record a delivery you will select from the suppliers list to help keep track of deliveries, demonstrate traceability and evidence that incoming foodstuffs/ingredients have been checked as suitable.
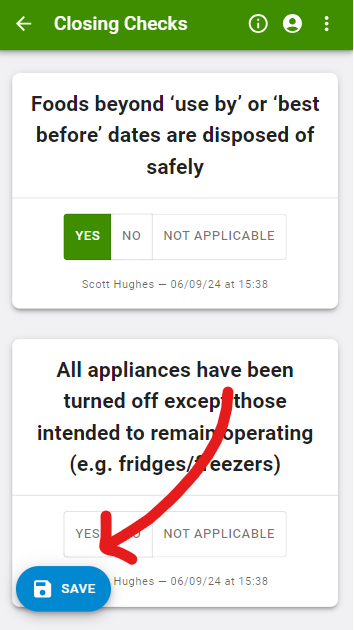
Select which checklists apply to this particular unit. Clicking the green toggle next to a checklist allows it to be added manually each trading day. If you also tick the gold star, the checklist will be added automatically each trading day, ensuring it cannot be accidentally forgotten.

The gold tick next to a check means that a trading day cannot be signed off without that specified check being completed. This allows you to make the DSMS work to the specifics of your business, and to ensure required checks are being done.

Add your custom checks – you can add any custom checks to any of the checklists using the Custom Checks feature at the bottom.
Click the green ‘add’ button, select the checklist you wish to add a custom check to and enter the details. This is a useful feature for any bespoke checks you may have such as a fire alarm test, specific equipment or premises checks etc.

Set up your team:
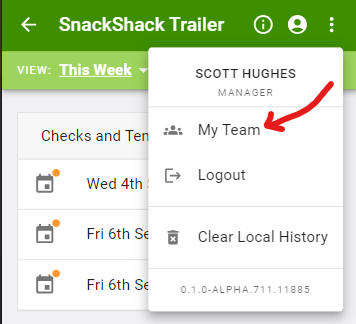
Step1: From the homepage, click the profile icon in the top right and go to ‘my team’. Here you can add and set up your team members for the DSMS across all of your units.
Clicking the green ‘add’ button will enable you to add a team member. Adding Team Members can only be completed by Managers.
Step 2: You need to enter the staff member’s name, email address and importantly assign their user level.
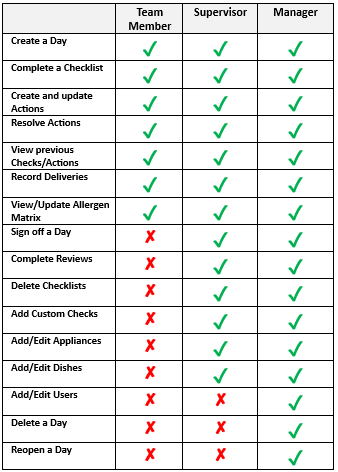
There are three variations of user level – business owner, supervisor and team member. Each of these user levels comes with different permissions as to what they can and can’t do on the DSMS.
Step 3: Select the Units/Premises you wish for the user be able to access and use and then click ‘Save’.
Step 4: The user will then be sent an email where they can complete setting up their DSMS account by creating a password.
Since each user has their own login details, it’s important that each team member logs in as themselves when using the DSMS.
This ensures accountability and that all logs, records, and checks are correctly attributed to the individual responsible.
After setting up your team, it is time to log your foods and create an allergen matrix.
To view the Allergen Matrix – From the homepage press the ellipsis at the top right, select ‘Allergen Matrix’.
The allergens are added at the point of creating a dish either through the plus button, unit settings or via the allergen matrix. With this information populated, a QR code will be added to the navigation bar that brings up your comprehensive allergen matrix. You can use this QR code to display the matrix anywhere – we would recommend printing one to display on your counter so people can easily see it.
Once you’ve added all the checks necessary in a day for the safe running of your business and set up your team members, you are ready to run with the DSMS.


Check out the commonly asked Q&As which can be found in the system and on our website: https://www.ncass.org.uk/dsms-faq/


 Featured Training